Chocolate chip cookie bars
- Jan 14, 2022
- 4 min read
Updated: Aug 3, 2025
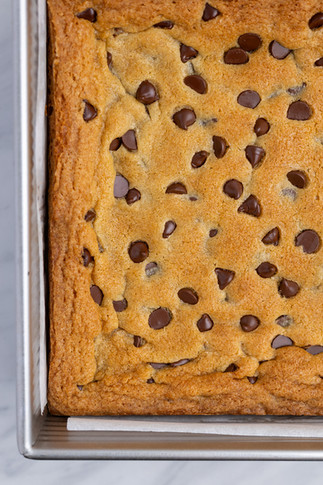
These bars are incredibly chewy and gooey and have chocolate in every bite. They stay soft for a few days, and are the best way to enjoy a chocolate chip cookie without having to scoop the dough - and you still get a delicious chocolate chip cookie center with crisp edges and top layer.

You still get the crisp and soft edges like you would in a chocolate chip cookie, but the middle texture is really the star here. You'll add an extra egg yolk for a bit of extra richness and chew, and just the right amount of flour so that your cookie bars don't get a cakey texture.
They will still taste great the next day and do keep their chewy and soft texture for a few days after baking, but of course there is nothing that will compare to eating one of these soon after they've been baked. The next day they'll have that same chewy texture but the edges will soften a bit which still tastes incredible.
I've dabbled before with cookie bars, and my favorite until now were my Reese's cookie bars (which I still highly recommend if you're a peanut butter cup lover like I am). The big difference in this recipe in the dough is the combination of brown and granulated sugar. This gives that classic chocolate chip cookie taste that just can't be beat. You'll load them up of course too with your favorite chocolate chips - when I'm going classic, my favorites are the semisweet chocolate chips from Guittard. In a chocolate chip cookie I usually go for chopped chocolate or larger chunks, but for the bars I wanted the classic chip look and it really worked perfectly.
For this recipe, I opted to use a hand mixer and to chill the dough so that we could mimic the texture and taste of a chocolate chip cookie as closely as possible. A stand mixer of course also works great. Though I don't recommend it, you can make this dough without a mixer - if you do choose to make this dough by hand, ensure that your butter is truly softened at room temperature and that you spend enough time at the start creaming your sugar and butter together. Making sure your eggs are at room temperature will also help with this process. The chill is something I wouldn't skip. I know it's so hard to wait but even just a few hours of chilling the dough will help to get you the most delicious, chewy texture for your bars. It's a great afternoon activity and then you can chill your dough while you enjoy dinner, bake at night and enjoy!


Ingredients:
12 tablespoons (170g) unsalted butter, room temperature
2/3 cup (127g) light brown sugar
1/2 cup (96g) granulated sugar
1 large egg + 1 large egg yolk
1 1/2 teaspoon vanilla extract
1 2/3 cup (200g) all purpose flour
3/4 teaspoon baking soda
1/4 teaspoon salt
8 oz (1 1/3 cup) semisweet chocolate chips of choice
Prep time: 10-15 minutes
Chill time: 2-4 hours (or overnight)
Bake time: 25-28 minutes
Servings: 16 cookie bars
Equipment:
9x9in square pan (or an 8x8 and increase the cook time a bit)
Hand mixer or stand mixer with paddle attachment
Parchment paper
Cooking instructions:
Place your butter and both sugars into your bowl if using a hand mixer (or stand mixer bowl). Bring your mixer slowly from a low to high speed and allow it to combine the butter and sugars for 2 minutes. Pause your mixer and use a spatula to scrape down the sides of your butter and sugar mixture as well as your mixer attachment to ensure that no pockets of butter and sugar go unmixed.
Add in your egg, extra yolk, and vanilla extract to your butter and sugar. Slowly bring your stand mixer back to a high speed and allow it to combine your mixture for another 2 to 3 minutes. Pause your mixer and scrape down the sides of your bowl and paddle again.
Add in your dry ingredients, flour, baking soda, and salt and start your mixer at a low speed mixing until your dry ingredients are about half incorporated.
Pause your mixer and add in about a cup (6 ounces) of your chocolate chips, reserving 1/3 cup (2 ounces) of your chocolate for later. Turn your mixer back on for about 15 to 30 seconds to disperse your chips and to finish forming your dough. You can also finish mixing by hand with your spatula to ensure you don't overmix your dough but that your chocolate is evenly dispersed.
Line a 9x9 inch square pan with parchment paper and press your cookie dough down evenly into your pan. Take your reserved chips and sprinkle them across the top of your dough. Gently press down your chips to make sure they are secured but do not press them in to much or they may sink when baking.
Cover your dough with plastic wrap and place your pan into the fridge for at least two hours to chill (up to 24 hours).
Once your dough has chilled, preheat your oven to 350 degrees. Bake your chocolate chip cookie bars for 25-28 minutes until golden on top. If you shake the pan, the center should just barely jiggle.
Allow your bars to cool before slicing (about an hour) and enjoy!
They taste best shortly after baking and the day of, but will stay fresh in an airtight container at room temperature or in the fridge for a few days and will keep their soft and chewy texture. You can always pop them into the microwave for 5-10 seconds to rewarm or into a 350 degree oven for about 5 minutes. You can also wrap the baked bars in plastic wrap and freeze to enjoy later.
Carb and serving info:
Servings: 16 cookie bars
Carbs per serving: 31
Carbs for full recipe: 502
Carbs from chocolate: 115 (adjust this if you use a different type of chocolate!)
Note: Carb information is calculated based on the specific ingredients I used to cook with to help guide my own insulin to carb ratio when dosing before I eat my home cooked recipes.


I love this recipe!! I've made them a couple times for events and people love them every time :)